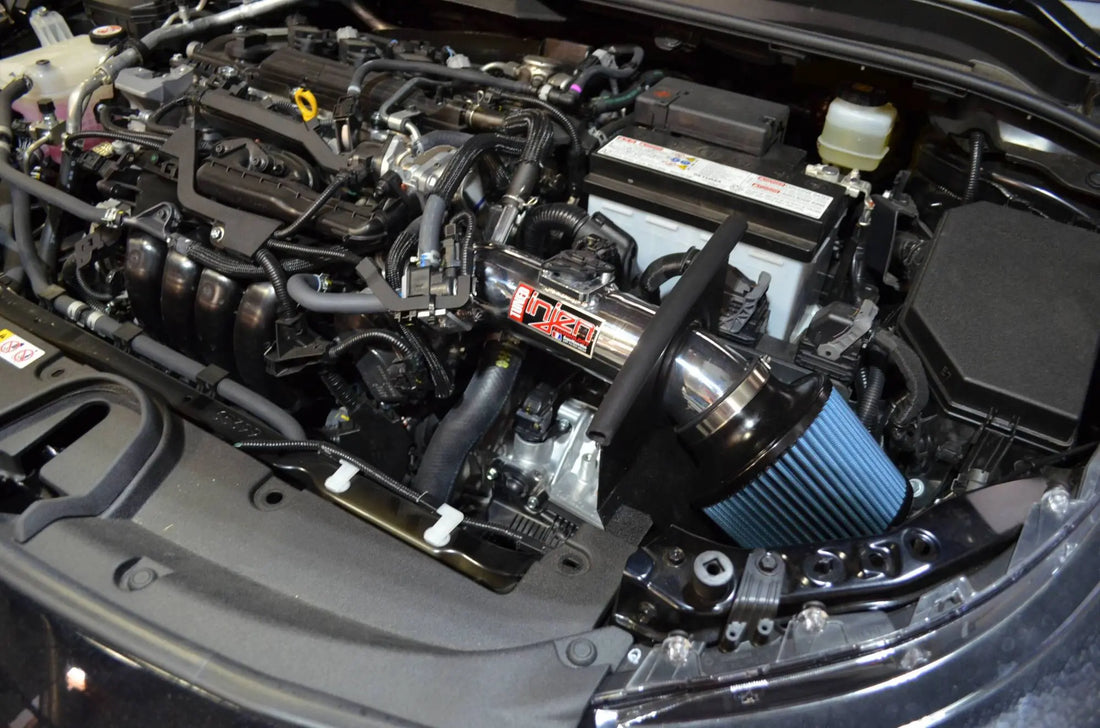
Injen Intake Install Guide — 2019–2025 Toyota Corolla (SP2081BLK / SP2081P)
What you’re installing
The Injen SP Series intake (SP2081BLK in black or SP2081P in polished) replaces your Corolla’s factory airbox and inlet tube with a smooth, free-flowing aluminum intake and heat shield. Expect a crisper throttle feel and a more pronounced intake sound—plus a clean engine bay look.
What’s in the box (parts layout image)

Fitment note: Your request targets 2019–2025 Toyota Corolla. Double-check engine/trim compatibility against your product listing before you publish (e.g., 2.0L vs. other variants). If fitment varies by trim, add a short fitment table here.
Tools & prep
- 8 mm nut driver, 10 mm socket or wrench
- Phillips screwdriver
- Flat blade screwdriver or panel popper (for clips)
- Clean shop towel
- Low-pressure air (15–20 psi) for optional filter cleaning later
- Optional: torque driver for hose clamps (snug—do not over-tighten)
Before you start
- Park on level ground, cool engine, set parking brake.
- Disconnect negative battery terminal if desired (protects against MAF DTCs while unplugged).
- Keep the factory airbox assembly—you may need it for emissions inspections or future use.
Emissions / Street-legal notice
Injen intake systems are street legal in most states unless the state is adopting to California Emissions standards. States that have adopted California emission standards include: Arizona, California, Connecticut, District of Columbia, Maine, Maryland, Massachusetts, New Jersey, New Mexico, New York, Oregon, Pennsylvania, Rhode Island, Vermont, and Washington. These states will require a California Air Resource Board Executive Order Number (CARB E.O.) for the legal use of an Injen intake system in your vehicle for use on public roads or highways. These vehicles will be considered "Legal in California only for racing vehicles competition use only, which may never be used upon a public street or highway." Please keep your factory air box assembly for any future use.
Step-by-step installation

- Remove crankcase line from the stock intake tube.
- Disconnect MAF sensor harness and pull the harness cable free from the air box.
- Loosen throttle-body clamp (10 mm). Using a Phillips screwdriver, remove the screw holding the vacuum switching valve and pull the valve away from the intake tube.
- Leave the original bracket attached to the stock intake tube; it will not be reused.

- Un-clip the upper airbox and lift it out of the vehicle.
- Loosen the two bolts securing the lower airbox and remove it from the vehicle.
- Remove the two stop-screws (Phillips) and push clips, then remove the plastic radiator shroud.
- Loosen the four bolts holding the OEM ram air scoop and remove them.

- Lift up and remove the OEM ram scoop.
- Loosen the screw on the radiator support—this will be used to mount the heat shield.
- Install rubber trim along the top of the heat shield and vinyl trim around the heat-shield cutout/hole.
- Install the heat shield. Secure using the provided M6 hex screw and fender washers.

- Remove the MAF sensor from the OEM housing (two Phillips screws). Handle carefully.
- Install the MAF sensor into the new Injen tube using the provided M4 screws; tighten gently.
- Install the step hose onto the throttle body. Tighten the clamp on the throttle body only (8 mm).
- Feed the intake tube assembly through the heat shield and position it onto the throttle-body coupler.

- Attach the crankcase line to the intake tube fitting using the OEM clamp.
- Align the intake tube for best fit and tighten the remaining clamp (8 mm).
- Mount the vacuum switching valve to the bracket on the intake tube using the provided M5 hex screw.
- Secure the harness line to the bracket using the provided zip tie.

- Re-install the plastic radiator shroud and secure. (Optional: The OEM ram scoop can also be reinstalled; it may sit close to the heat shield.)
- Reconnect the MAF sensor harness.
- Install the air filter on the intake tube and tighten the clamp (8 mm).
First start & checks
- Visually confirm no tools or rags remain in the bay.
- Start the engine—listen for air leaks or whistling.
- If idle surges or a CEL appears, power down, re-seat the MAF connector, and recheck clamps/couplers.
- After a short drive, recheck all clamps and hardware.
Filter care (cleaning instructions)
To clean your filter:
- Carefully remove the filter from the housing.
- Wipe down the heat shield/housing with a clean shop towel—avoid knocking debris into the air inlet.
- Clean the filter by lightly vacuuming the media from the dirty side, or hold the filter with one hand and blow from the clean side at a 45° angle using low-pressure shop air (15–20 psi).
- Let the filter dry fully if moisture is present; do not over-oil (dry media).
FAQs
Will this trigger a check-engine light?
Not when installed correctly. Make sure the MAF is oriented the same way it came out and all clamps are snug.
Do I need a tune?
No tune is required for installation.
What about emissions inspections?
See the Emissions / Street-legal notice above. Keep your factory airbox for inspections or future needs.


