PLM X-Bar Product Spotlight (DC2 Integra)
PLM X-Bar for DC2 Integra (1994–2001): Improve Chassis Rigidity Without Ditching Your Rear Seats*
Check out Elite's youtube video on this product HERE
What it is
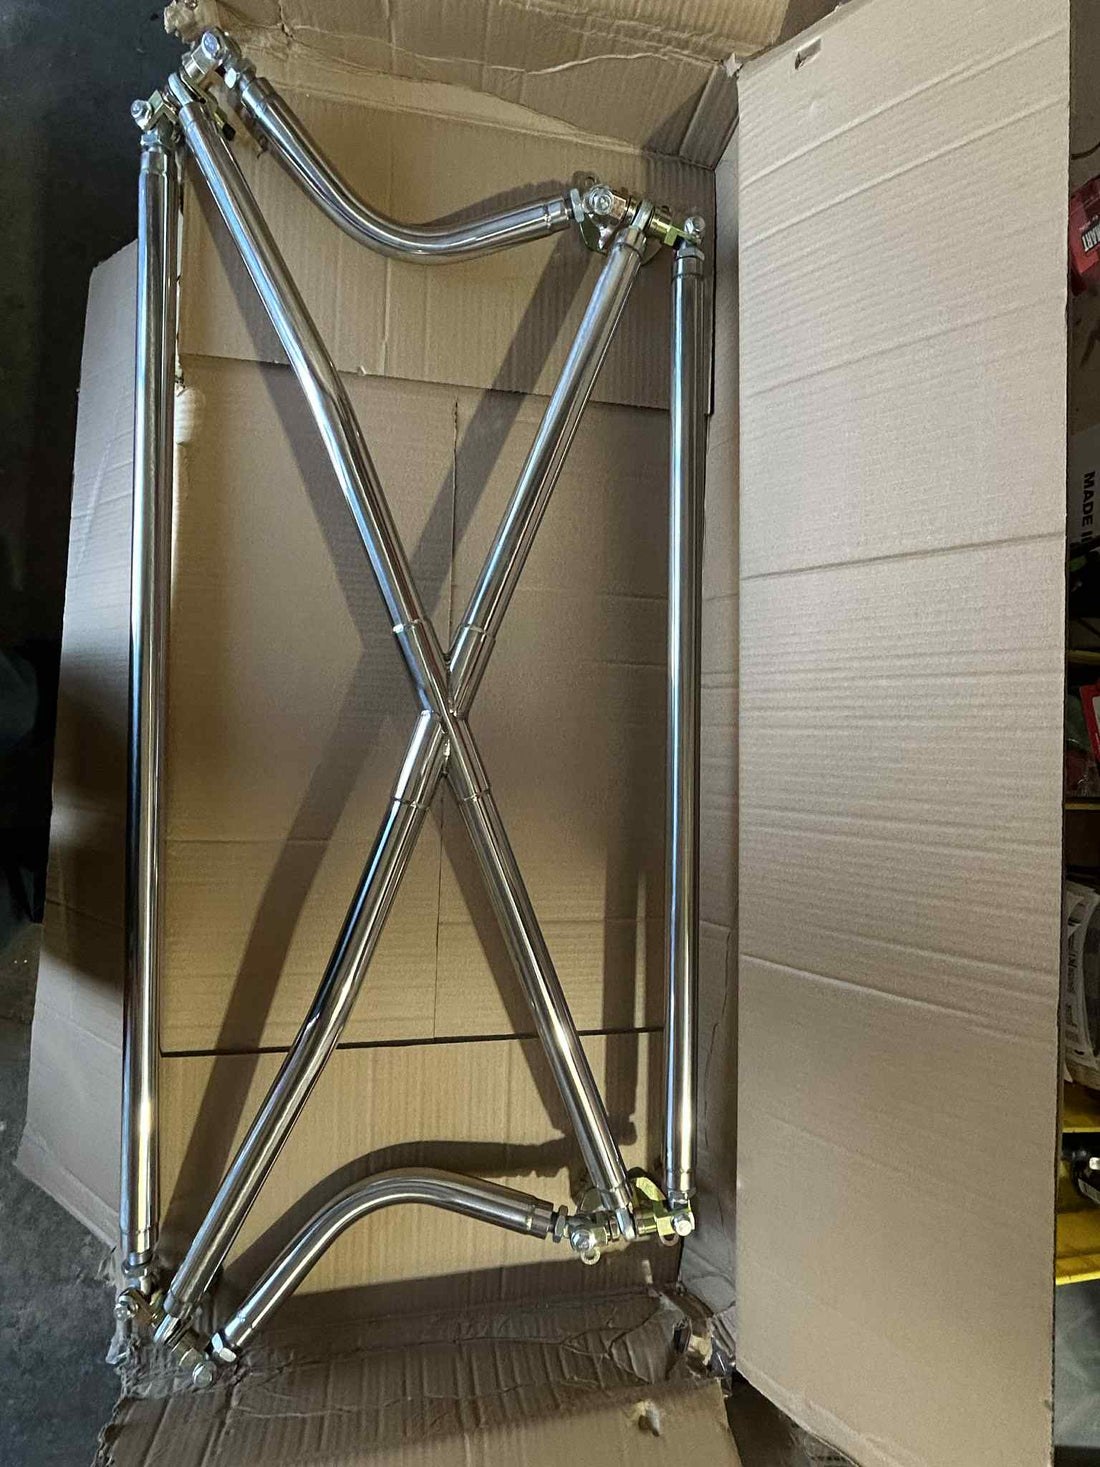
The PLM X-Bar (Part # PLM-HDC2-X-BAR) ties together critical points in the DC2 chassis—using the C-pillar and rear strut locations—to reduce body flex and sharpen handling. It’s designed to be strong, tidy, and as OEM-friendly as possible, with the option to keep interior panels and (in many cases) rear seats.
Why enthusiasts install it
- Flatter cornering & better stability under load
- Four-point bracing integrates pillars and strut points into a single stress-resistant structure
- Clean, motorsport look in the hatch area
- Stainless construction with mandrel bends and hand TIG welds for durability
Key features
- Stainless steel construction
- Mandrel-bent tubing
- Hand TIG-welded joints
- CNC-machined, laser-cut brackets
- 1-year warranty from PLM
Fitment
- Vehicle: Acura Integra DC2 (1994–2001)
- Chassis notes: Designed around C-pillar + rear strut points for DC2 geometry.
Important install/trim notes
- Rear seat retention: Some models will not be able to retain rear seats.
- Interior panels: If you want to keep interior plastics, some trimming is required.
- Pro tip: Test-fit with panels off, mark cut lines carefully, and deburr edges for a factory-like finish.
Specs & options (quick table)
| Item | Detail |
|---|---|
| Brand | PLM (Private Label Mfg.) |
| Part Number | PLM-HDC2-X-BAR |
| Material | Stainless steel |
| Brackets | CNC machined, laser cut |
| Welds | Hand TIG |
| Configuration | X-bar linking C-pillar & rear strut points |
| Finish | Metal |
| Included Hardware | Crossbars, mounting hardware |
| Weight | 24 pounds |
| Warranty | 1 year |
Install overview
- Difficulty: 2.5/5 (intermediate if retaining interior panels)
- Estimated time: [1–2 hrs: placeholder]
- Tools: [Socket set, torque wrench, trim tools, step bit: placeholder]
- Basic steps:
- Remove rear interior trim and inspect mounting points.
- Mock up the X-Bar; loosely install brackets at C-pillar/strut points.
- If retaining plastics, mark and trim carefully; re-test fit.
- Torque hardware to spec (use threadlocker if recommended).
- Reinstall panels (if used) and check clearance.
Track-day tip: After your first spirited drive or event, re-torque fasteners once the chassis has settled with the new brace.
Who it’s for
-
DC2 owners who want real handling gains without a full cage.
-
Street/HPDE/autocross builds aiming for sharper feedback and a stiffer rear section.
-
Enthusiasts who value quality fabrication and a clean install.
Availability & ordering
-
Price: $349.99
-
Ships from: Greensboro NC
-
What’s in the box: PLM-HDC2-X-BAR
See fitment & options on the PLM X-Bar product page HERE
FAQ
Will my rear seats still work?
In some DC2 models, yes—but not all. Expect limited seat functionality or possible removal depending on trim and seatback clearance. Review our Rear Seat Retention note above.
Do I have to cut my panels?
Only if you want to keep the interior plastics. The X-Bar can be installed without panels, but panel trimming is required to retain them.
Is it compatible with coilovers/strut bars?
Generally yes; however, check clearance for any existing rear strut tower bars or trunk accessories.
Is this street-legal?
Typically yes, but local regulations vary. Avoid sharp exposed edges; keep belts and latches unobstructed.


